Excerpt
The Realism Challenge
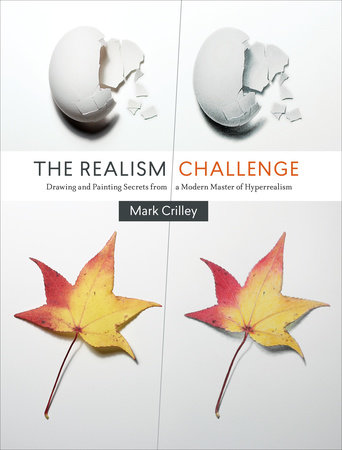
Introduction A few years ago, I uploaded a video to YouTube called “Realism Challenge: Crumpled Paper.” It opened on a small sheet of white paper on the left-hand side of the screen, which I picked up and lightly crumpled. The remaining two minutes of the video were devoted to me doing an illustration in time lapse—right there beside the crumpled paper—of that very same object.
It was a simple enough idea. But something about it captured people’s attention.
It got hundreds of thousands of views, prompting me to try a similar exercise, this time with a sliced mushroom in place of the crumpled paper. When that one proved equally popular, I tried a third—this time with a torn-up playing card. That one proved the most popular of them all; as of this writing, it has had more than six million views. I began to understand that these videos were supplying people with a visual experience they’d probably never had before.
Was I doing something new in these videos? Well, yes and no.
It is common enough to see a seemingly three-dimensional object that is, in fact, a painting. Indeed, examples of “trompe l’oeil” painting—images designed to fool the eye in this way—can be found as far back as Greek and Roman times. An artist creating a mural in ancient Pompeii may have playfully painted an open window where in fact none existed. Such exercises in hyperrealistic trickery have continued over the centuries right up to our own times. So no, there is nothing new about an artist painting something at actual size in an effort to make it seem real enough to reach out and touch.
But seeing an artist go up against a real object—one that remained right there in full view as the artist worked—that was something relatively new. By leaving the object in view, I put myself to the ultimate test of capturing reality. I invited the viewers to compare the two—object and illustration—with their own eyes and say to what degree I had succeeded or failed.
And yet I had the nagging feeling that this “realism challenge” thing could be more than mere video entertainment. It was an opportunity to pull back the veil and allow people see how illustrations are made, from beginning to end. I’ll bet you’ve had the experience of looking at a realistic painting and asking,
How did they do that?
It seems to me you’re entitled to an answer to that question. There’s no reason why it has to remain a mystery. I know how it’s done because I’ve done it. I want you to know, too, and that’s why I decided to make this book.
In these pages, you will find thirty “realism challenge” lessons. Each begins with a photograph of the “target object”—the item to be re-created in illustrated form. From there, you will see the key steps in the illustration process, each explained to you as clearly as possible in easy-to-follow terms.
It’s not enough for an artist to glibly tell you that the process consists of looking at an object and drawing it. You need to know which art supplies were used. You need to know the order in which those tools were applied. And you need the illustrator to call your attention to what you’re seeing—to tell you what changes were made from one step to the next and why. I will do all of these things in the pages ahead.
Can I guarantee magical results for the aspiring artist who has a lot of ambition but little patience? No. But if you can draw what you see with some accuracy, there’s no reason why you shouldn’t be able to learn the art of the “realism challenge.”
Art teachers often say, “You need to know the rules in order to break them.” Press those same teachers to tell you what the “rules” really are, and they may fumble a bit as they answer. But one thing’s for sure: acquiring the ability to draw every detail of an object that stands before you—to capture the way its shadow hits the ground or the way light glints off its surface—is a worthy goal. Humans have sought to master it since the dawn of time.
So here’s to you and your realism challenges. Nothing would make me happier than knowing that I’ve helped you unravel the mystery of
How did they do that? You must promise me this, though: promise me you’ll go beyond knowing how they did it to doing it yourself.
Art Supplies I’ve always felt that people fixate a little too much on art supplies. It’s tempting to think that if you go out and buy the same materials that a professional illustrator uses you will gain some kind of huge head start toward achieving similar results. But you can’t buy skill. You can’t buy years of practice. You can’t buy the ability to see what’s working in your illustration and what isn’t.
So my advice is to go to your local art store and get reasonably priced art supplies. Sure, you don’t want the kind of cruddy art supplies they sell at the corner drugstore. But unless you’re already a paid professional, there’s no need to blow a thousand dollars or more buying top-of-the-line materials. The people at the art store should be happy to guide you toward art supplies that will get the job done without emptying your wallet.
Paper One place where beginning artists do tend to sell their own artwork short is in the realm of paper. The illustrations you see in this book could never have been done on flimsy office paper. Watercolors cause that paper to wrinkle into a soggy mess. What you need is smooth-surface Bristol board. This sturdy paper is the thickness of card stock or poster board. It will hold up to the wear and tear of the illustration process. I buy it in 11–by–14–inch pads, twenty sheets at a time. Just make sure you get the smooth-surface variety. A rougher vellum–type surface will make it hard for you to do detailed work with your colored pencils.