
Creative Wood Letters
35 Simple Craft Projects for Decorating Your Home
Krista Aasen
Ebook
June 5, 2018 | ISBN 9780399581090
AmazonApple BooksBarnes & NobleBooks A MillionGoogle Play StoreKobo
About the Book
Krista Aasen of The Happy Housie blog presents a collection of 35 creative projects that can brighten up the walls of any house.
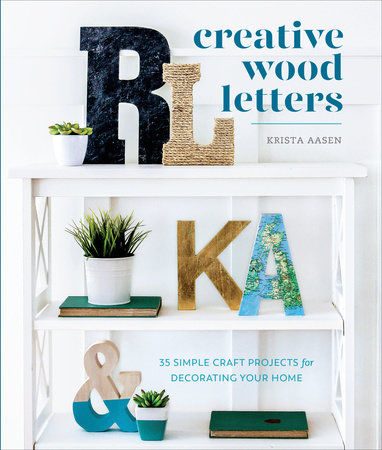
Decorating wood letters is a fun and simple project for the home, from a child's name in a bedroom to an uplifting message above the mantel. But how do you achieve the pin-worthy results of the stylists you see online? Enter Krista Aasen of The Happy Housie blog, whose crafting experiments with wood letters have been shared hundreds of thousands of times. In Creative Wood Letters, Aasen reveals unique ideas and techniques to craft beautifully decorated letters inspired by everything from nature to art using maps, vintage book pages, photo transfer, paper flowers, washi tape, succulents, driftwood, metallic paints, lights, and more. With a wide variety of styles from rustic and beachy to cute and sparkly, this book's wood letters are perfect for gracing the walls, shelves, and nooks of kitchens, bedrooms, and beyond.
Decorating wood letters is a fun and simple project for the home, from a child's name in a bedroom to an uplifting message above the mantel. But how do you achieve the pin-worthy results of the stylists you see online? Enter Krista Aasen of The Happy Housie blog, whose crafting experiments with wood letters have been shared hundreds of thousands of times. In Creative Wood Letters, Aasen reveals unique ideas and techniques to craft beautifully decorated letters inspired by everything from nature to art using maps, vintage book pages, photo transfer, paper flowers, washi tape, succulents, driftwood, metallic paints, lights, and more. With a wide variety of styles from rustic and beachy to cute and sparkly, this book's wood letters are perfect for gracing the walls, shelves, and nooks of kitchens, bedrooms, and beyond.
Read more
Close

